Custom Code Editor
A new feature for advanced HTML users
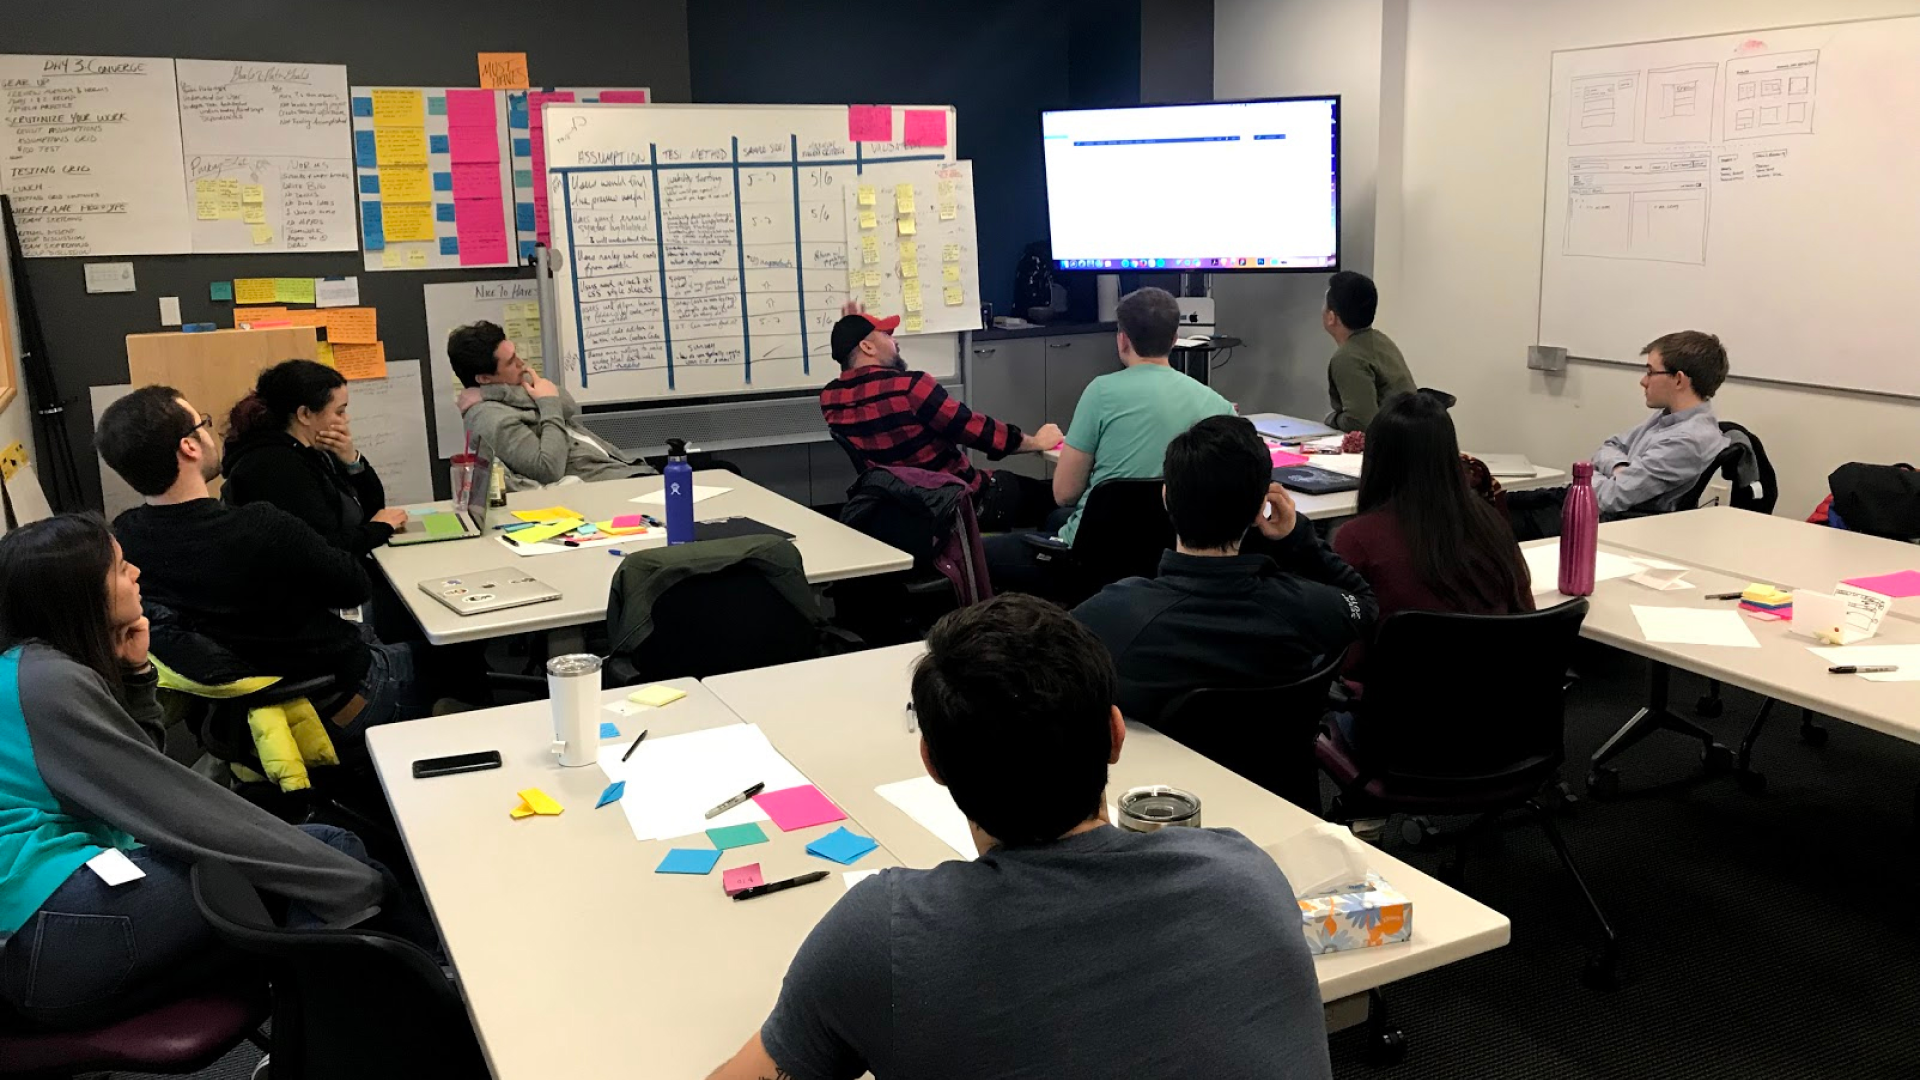
Pre pandemic I ran a design workshop with a group of new engineers to design and build an advanced custom code editor. This was a way for me to educate the team on how the proper UX process works.
Through a series of exercises including clarifying & prioritizng assumptions plus unpacking the existing research & product, we determined that the problem statement was:
As a user who wants more control than the 3GE experience allows, I want to use HTML created elsewhere so I can send emails that look the way I envisioned and have access to newer product features.
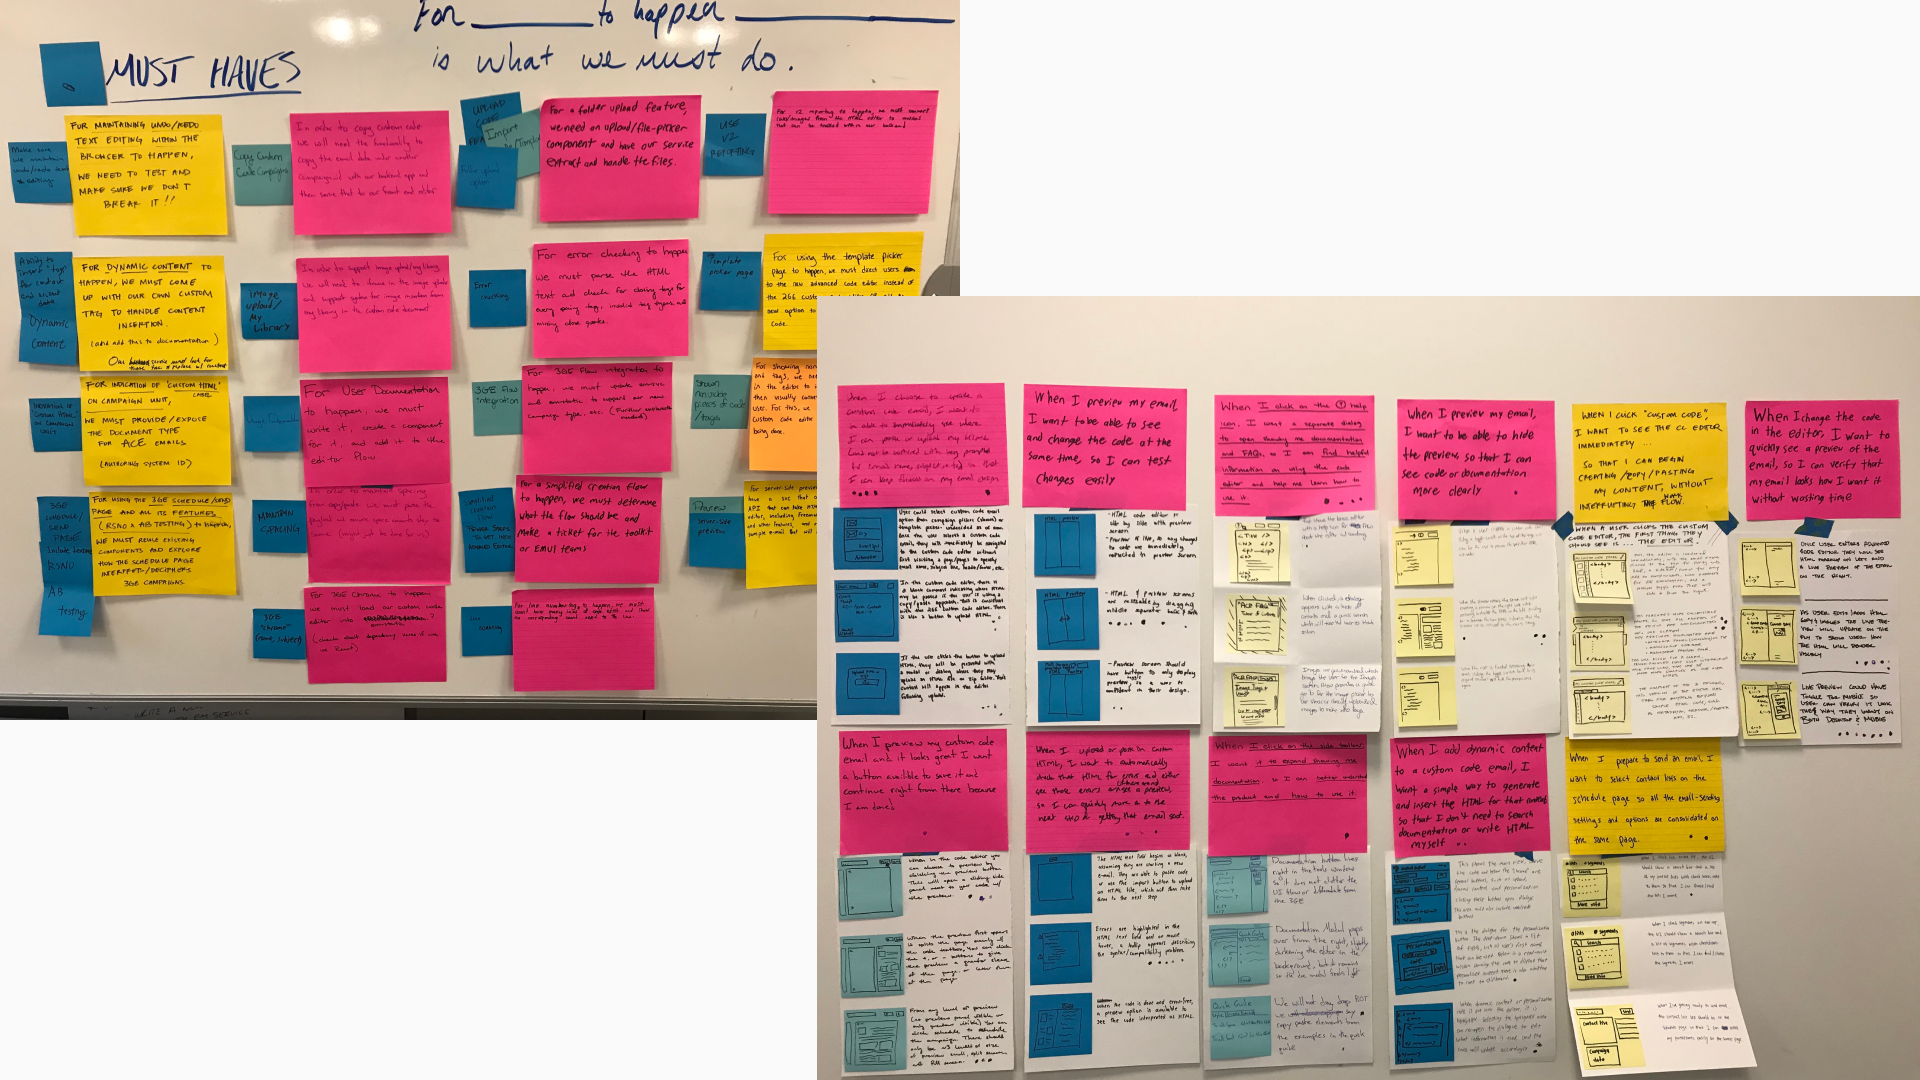
Another series of exercises including empathizing with the user via Journey Maps, prioritizing brainstormed opportunities, and wireframing, we conducted ideation exercises to examine the Custom Code Editor, an area of the product that has not been addressed in quite some time.
Link to Invision Prototype
Demographics
- Design/Code background
- Marketing / Communications professional
- CTCT savvy
Needs & Goals
- Flexible tool
- Import existing code
- Customization & control (precise email)
- Wants reporting
- Coherent flow
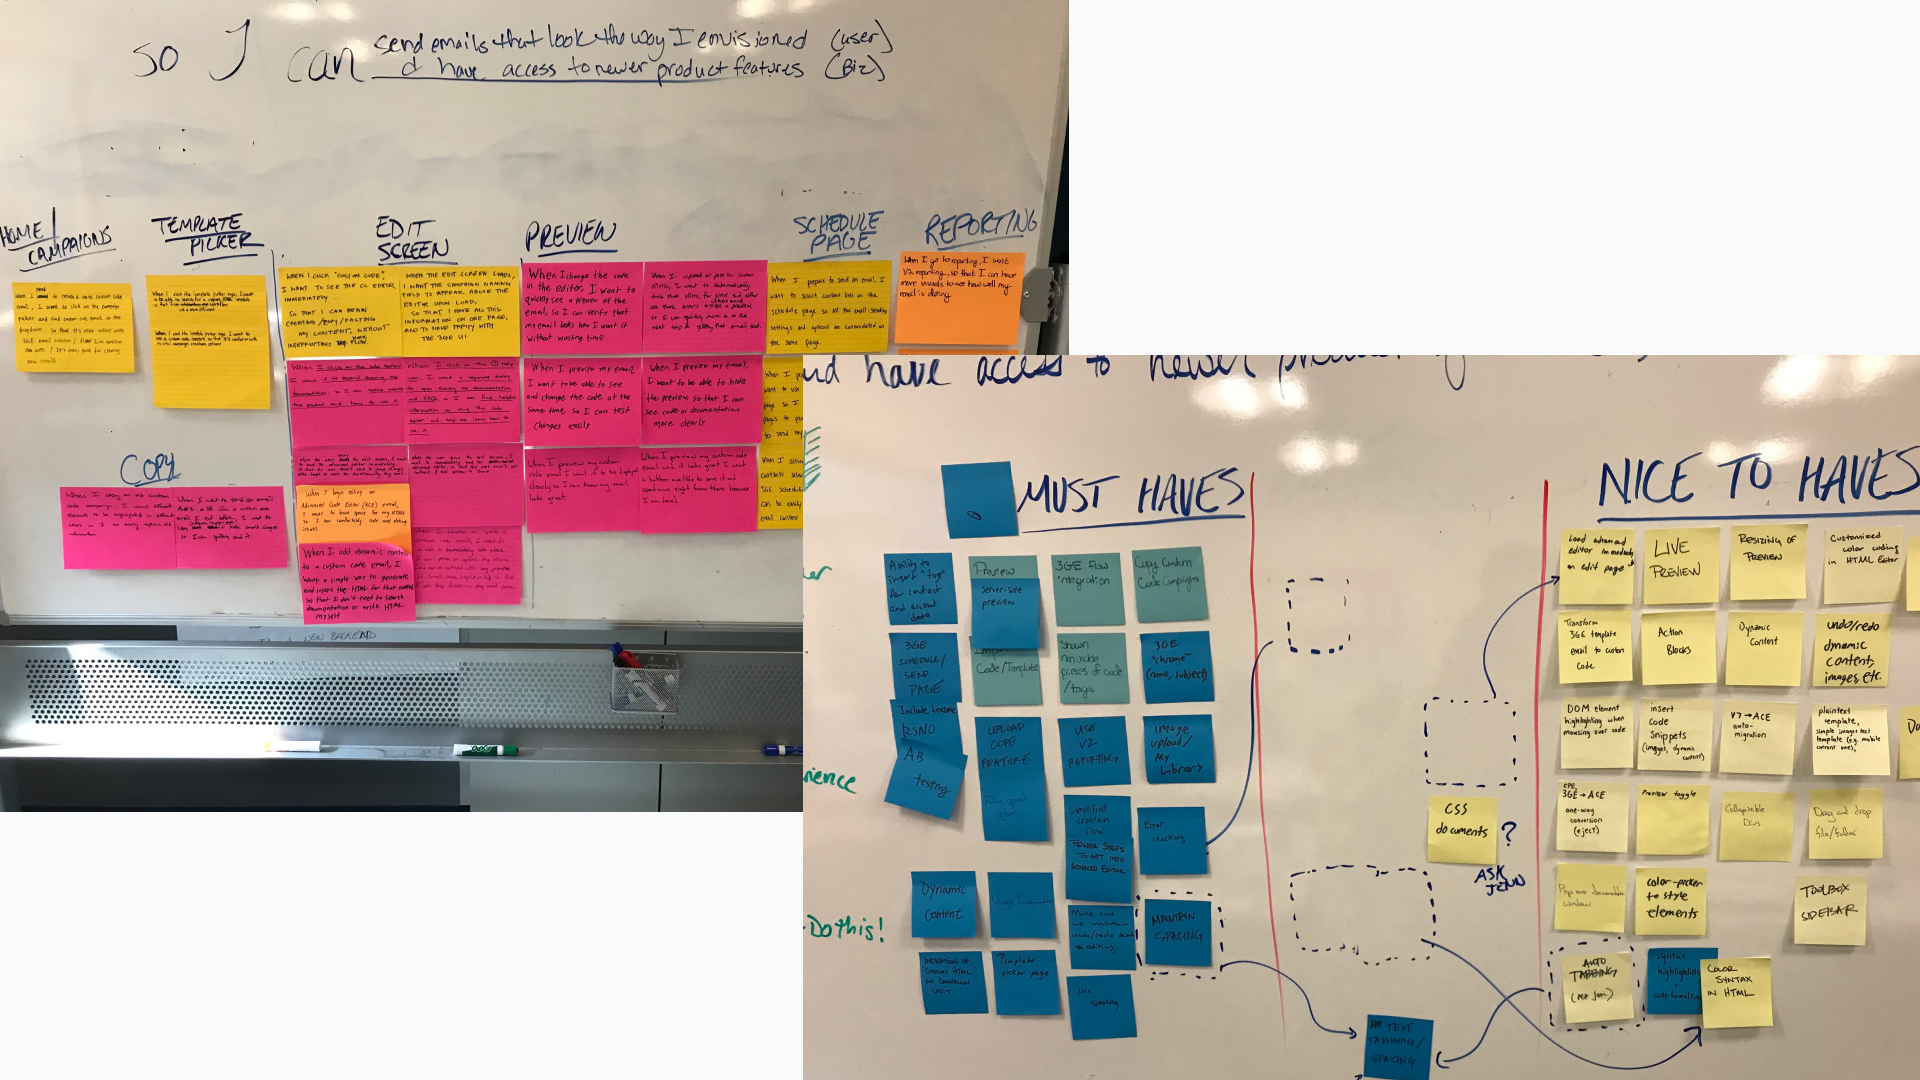
The team built two journey maps, one based on the current custom code experience and another on the current 3GE experience. One was focused on identifying pain points in the custom code experience and the other to identify where we have opportunities to enhance the experience using the 3GE flow.
Opportunities:
- Consolidating several ‘setup’ screens into one
- Select format is confusing (html vs. xhtml)
- Provide an actual preview screen
- Live preview for quick view of email from code
- Load advanced editor on start up
Themes:
- The current flow requires many steps just to get to the editor
- The actual editor to place code in to is not discoverable
- The overall look and feel is quite dated
- Wants reporting
- There is a lack of basic features that 3GE users would otherwise get
The group developed job stories from opportunities and these were used for creating storyboards. Each member created two storyboards. From the storyboards we brainstormed a list of features that are Must Haves and Nice to Haves.
Facts & Assumptions
The next step was to come up with facts and assumptions. Using a grid and $100 to vote all the assumtions were plotted to identity what are the assumptions the group has the least confidence in and were deemed the riskiest.
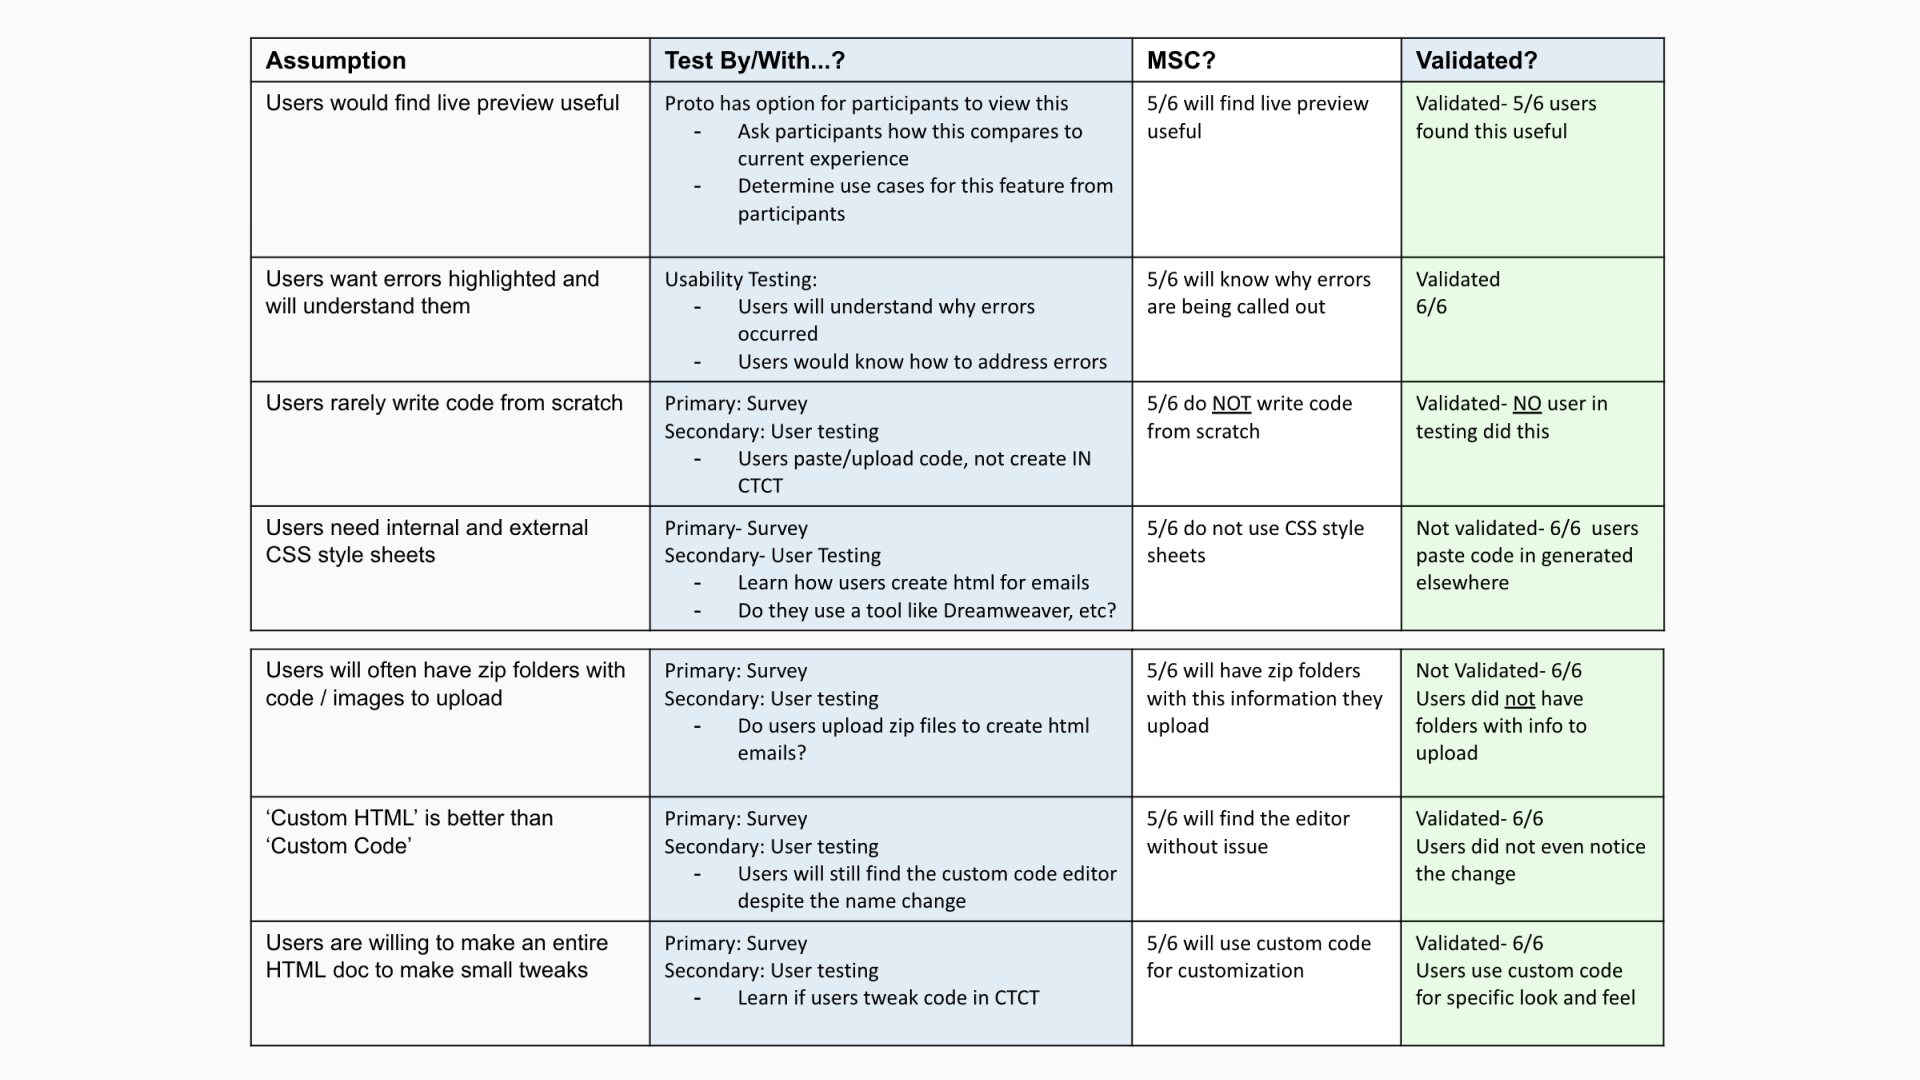
Testing Grid
We developed a test grid to prioitize what the group felt were the riskiest assumptions with the least confidence.
Wireframes
I then sketched out the wireframes on a white board to get feedback from the group. We were able to see how the requirements would look from low fidelity sketches.
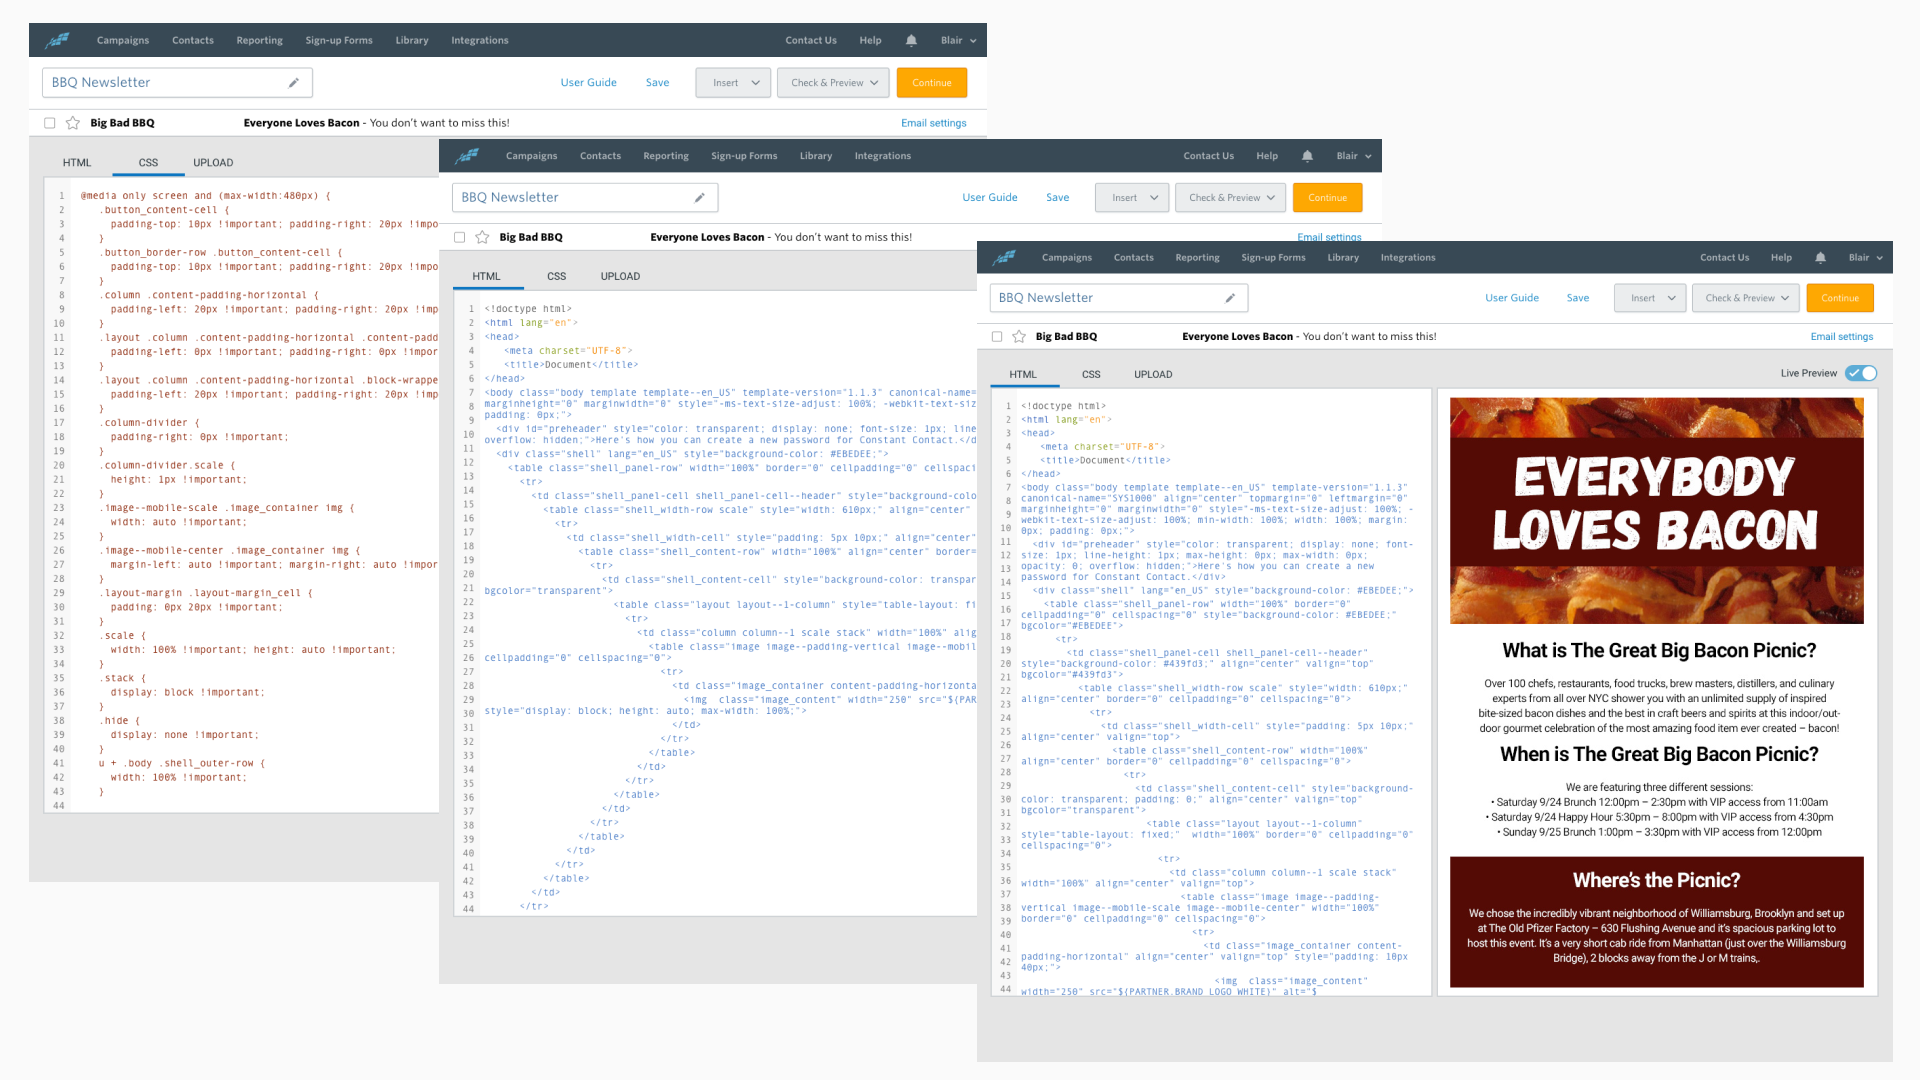
Designs & Prototype
After reviewing the wireframes I took the time to create high a fidelity mock up using Sketch. I was able to show the team how I do this projecting to a big screen tv.
(See photo below) After reviewing all the designs with the team I created an Invision clickable prototype for user testing.
User Testing
Our UXR named Stuart ran 6 user testing sessions and we were able to validate 5 of 7 assumtions.